Editing Button Component Settings
After you added a button component to a template, you see the component with an instruction in the editor field, as shown in the following illustration.
Additionally to the common settings name and label, you can change the following button component-specific settings. For information on how to change the common settings, see
Editing Common Component Settings.
To edit specific button component settings:
1. Click in the “Type here to add buttons” field.
2. Do one of the following:

For single-line buttons, type each item on a separate line, then press the Enter or Return key. For example, entries in a list of weather conditions are listed as follows:
Sunny
Cloudy
Partly Cloudy
Showers

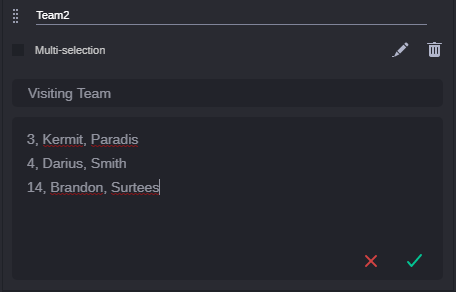
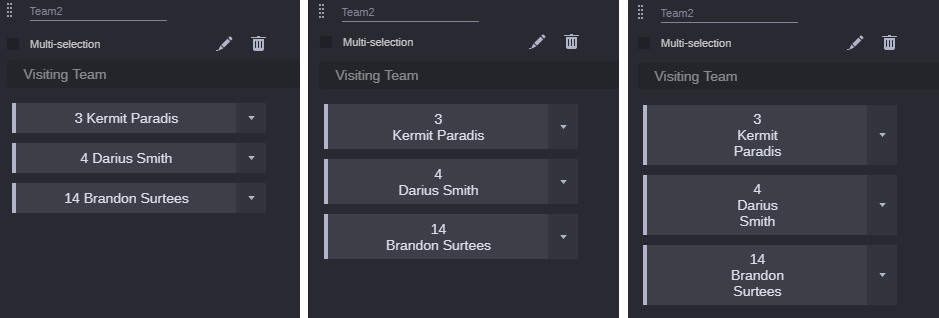
For multi-line buttons, type the information for each button on a single line, separated by commas, then press the Enter or Return key. Each comma forces a line break on the button. Each button can display a maximum of three lines. Example for a three line button:
3, Kermit, Paradis
4, Darius, Smith
3. Do one of the following:

To discard your changes, click the red X.

To save your changes, click the green check mark.
The editor closes and the buttons are shown in preview mode on the template. The button height is based on the number of text lines.
The button width is determined by the width of the component on the template. Three buttons can be shown in one row at maximum.
To toggle the editor from preview back to edit mode, click the Edit button in the component header.
4. Select the Multi-selection check box if you want to allow populating a span with multiple button values.


