Sending To: YouTube
The send to YouTube option enables users to send a text message along with an associated media asset to authorized YouTube applications.
Unlike endpoints such as Facebook or Twitter, you are not required to authorize a YouTube profile in your user settings. Instead, your system administrator creates a YouTube profile in the Workflow Settings app. Once that profile is created, the YouTube endpoint is available to all users with the appropriate entitlements.
To publish to YouTube:
1. If necessary, click the plus (+) button in the Send To menu to add a YouTube endpoint.
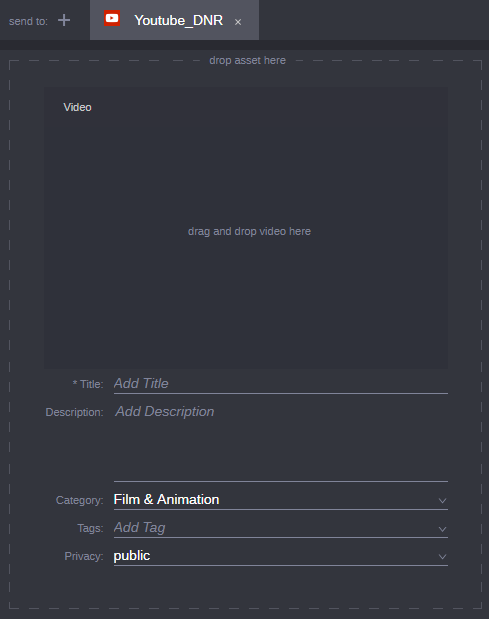
The endpoint appears as a new tab as illustrated below.

If you add a video file that does not meet YouTube’s format requirements, the Publish app displays an error message to inform you of the problem.
3. Add a title to your package by entering text in the Title field.
4. (Optional) Add a short message to your package by entering text in the Description field.
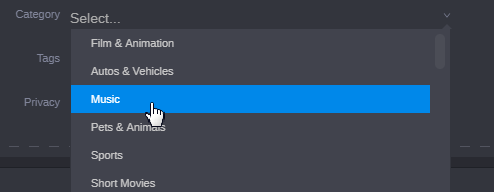
5. (Optional) Associate a category with your YouTube package by clicking the arrow to the right of the Category field and selecting an option from the menu.
YouTube categories allows users to find your content more easily which can lead to an increased search ranking for your post.
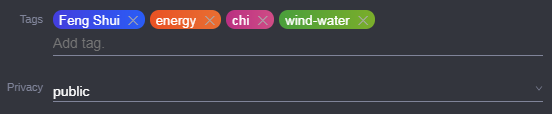
6. (Optional) You can further increase the likelihood that your content will be found on YouTube by adding one or more add keywords or tags to your package. Click on the Add Tag field and enter text to create a custom tag. After you are done typing, press Enter (or Return on a Mac keyboard) to add the tag.
Each time you add a tag, it appears as a “pill” in the Tags field. You can add one or more tag as shown in the following illustration.
After adding a tag, you can easily remove it by clicking on the “x” to the right of the pill.
7. (Optional) Select an option from the Privacy menu.
- Public: All users can see the content. This is the default option.
- Private: Only certain users that you identify through YouTube can see the content.
- Unlisted: Only the user who created the job can access to the content.
8. (Optional) Configure additional endpoints as needed.
9. Finally, click the Publish button in the Publish header to complete the process.
If you want to watch the progress of your Publish job, open the Process app for a status of all jobs submitted by the current user. For more information about the Process app, see
Working with the Process App.
If your Publish job is successful, the information on your completed job is cleared from the Publish app, resetting all endpoints to their default configuration. If the job is not successful, the configuration information is maintained so that you can review and attempt the job again.