Publishing with Closed Captions
If you export your clip to a CMS, OVP or social media platform that supports CC (Like YouTube and Facebook), then the sidecar file (like SRT or WebVTT) is automatically sent. If you prefer to have the captions “burned” into the video, then select the option for the specific destination you want the captions burned.
Publish Templates can specify the desired action for a specific destination. For example, you can set a Twitter account to get Burned CC with a specific style, another TW account to get a “clean” video, Facebook to get a sidecar file and your CMS to get a WebVTT file. Selecting the Publish Template for a clip will automatically apply the desired settings.
Selecting the Publish Template for a clip will automatically apply the desired settings.

You can send a “clean” version without the captions burned to some destinations while having the “burned” version sent to others.
To publish with Closed Captions:
1. In the Clip Publishing details, click to expand the details for a specific destination.
The Image Selector window opens.
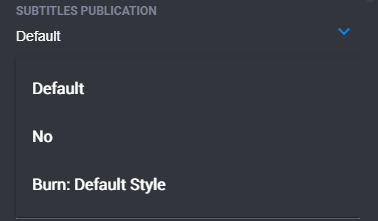
2. In the Subtitles Publication field, select one of the following options:

Default - Leave the value to default to send the SRT file to the destination, if that destination supports it.

No - Select No, to publish the video without subtitles or closed captions.

Burn: Default Style - Select one of the predefined Closed Caption options. There might additional closed captions “Styles” to choose from (e.g., Decorators tab > Subtitles option). You can also create your own. For more information, see
Defining Closed Caption Options.
3. Once the clip is published, the desired Closed Caption option will be applied to each destination.
