Publishing Video Clips and Media Assets
This topic contains information on the basic procedure regarding how to publish video clips and media assets to a predefined social media destination (e.g., Facebook, YouTube, Twitter, and others).
To publish video clips and media assets:
1. Add the content that you want to publish (e.g., a sequence, Master clip, or subclip) to the Publisher app.
2. 
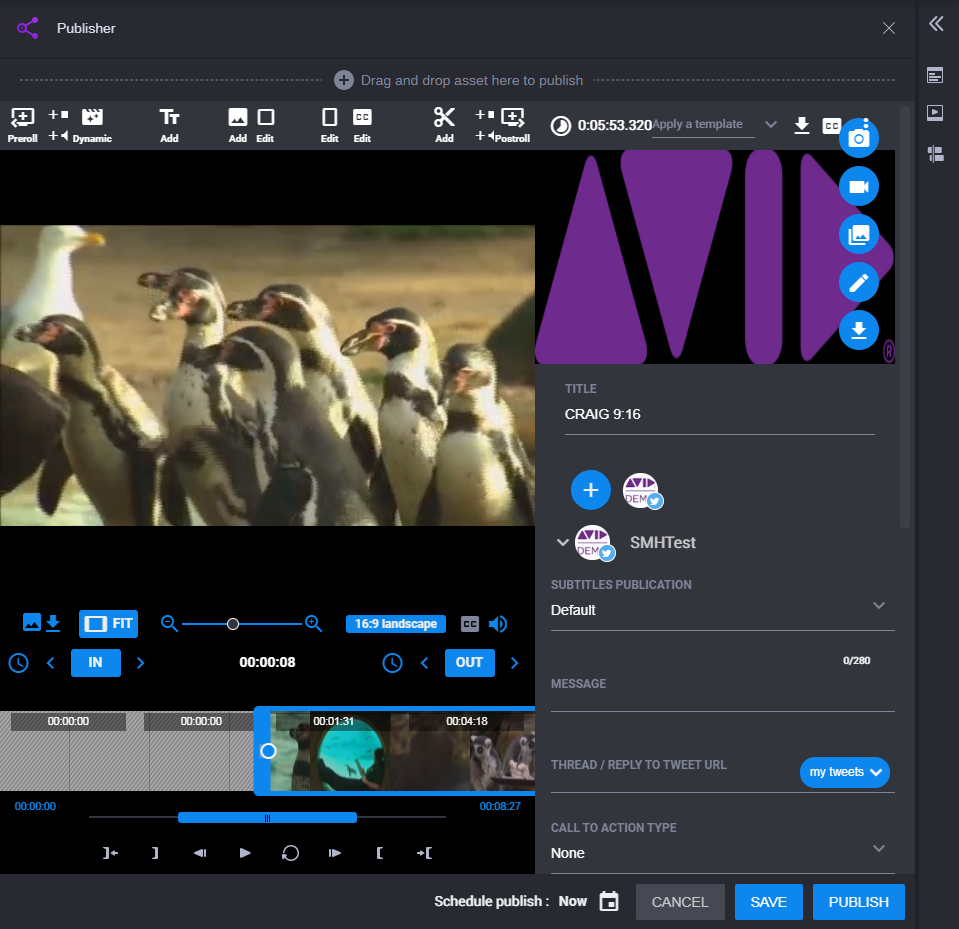
Click the Publisher app icon to open the Publisher app user interface.
The example above shows only the Publisher app with the Clip Details area on the right. The Metadata area is hidden.
3. (Option) If you want to make enhancements to the media or clip (e.g., adding or editing graphic overlays, text overlays, subtitles, etc.), you can use the Enhancement icons on the Editing toolbar.
For more information on each of the Enhancement icons and how to use them to enhance your video clip or media asset, see
Enhancing Video Clips and Other Media Assets.
4. (Option) Choose a template to add to your video by clicking the arrow to the right of the Apply a template field.

Templates are optional. They are created by the System Administrator in the SAAS platform. Most likely, you will be given access to the template(s) that are approved for use when posting media to certain social media destinations.
5. (Option) If you have selected a template, there might be some required fields that you need to populate (such as Title, or Message) before you publish. So, if that’s the case, you will need to complete those fields first. Other than that, you can choose to do one of the following:

Make additional changes to the template in the Clip Details area. For more information, go to Step 6.

Save and publish the video using the template you selected. For more information, go to Step 8.
6. (Option) If you want to make changes to certain criteria before you publish your clip, it can be done in the Clip Details area. The top portion of the Clip Details area contains the global fields in which the data you enter is applied across all selected social media destinations. If you want to enter specific information that would only apply to a particular social media destination, you can do that in the Publish Destination portion of the Clip Details area. For more information, see Step 7.
a. (Option) Change the title of your video by typing a title (such as, Penguins... Penguins... Penguins...) in the Title field.
b. 
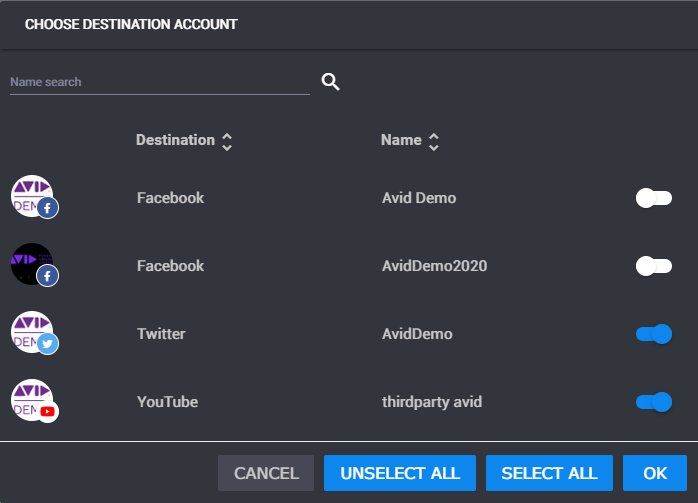
(Option) Add a different social media account than what has already been predefined for you, by clicking the blue Plus sign (+) in the Social Media Display area.
The Choose Destination Account dialog box opens. Select the social media platform(s) you want to publish the media to from those available to you by moving the toggle to blue (ON), and click OK.

If you do not want to publish to a certain social media platform, move the toggle to white (OFF), and click OK.
c. (Option) Add a message to appear with the clip by typing the text in the Message field.
d. Add a description by typing the text in the Description field.
e. (Option) Change the subtitle from the Default to one that better fits how you want closed captions to behave in the Subtitles Publication field.
f. (Option) Change the aspect ratio by doing one of the following:
- Select the drop arrow near the Aspect Ratio field, and select the desired aspect ratio (e.g., 16:9, 1:1, or 9:16) from the list.
- Select Compute from Source to have it automatically determine the correct aspect ratio for the social media platform you are publishing to.
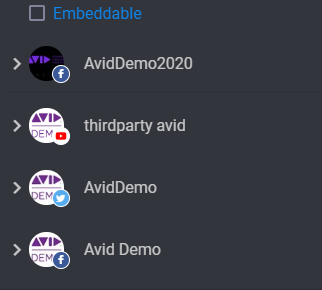
7. (Option) If you want to enter specific information for any of the selected social media destinations, scroll down to reveal the Social Media Specific Information icons:
a. 
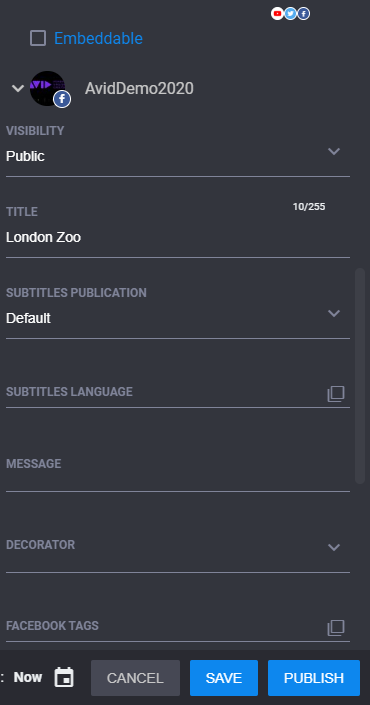
Click the carat to the left of the social media account you would like to enter specific information for. This reveals the fields specific to the social media account you want to modify.
b. From the field(s) provided, type any information that, when it’s posted, will be specific to the selected social media destination. Whatever you change here, will not be changed for the other social media destinations. They will continue to use the global entries.
c. Repeat this step for any other social media destinations.

When you click Save or Publish, the information you entered supercedes what has been entered in the Global fields in the top portion of the Clip Details area for that social media destination.
8. Do one of the following:

Click Save to save your changes.

Click Publish to publish the media to the selected social media location(s).
 Click the Publisher app icon to open the Publisher app user interface.
 Click the Publisher app icon to open the Publisher app user interface.
 Click the Publisher app icon to open the Publisher app user interface.


 (Option) Add a different social media account than what has already been predefined for you, by clicking the blue Plus sign (+) in the Social Media Display area.


 Click the carat to the left of the social media account you would like to enter specific information for. This reveals the fields specific to the social media account you want to modify.